You Tube How to Make a Baby Hat Using Half Double Crochet Stitch
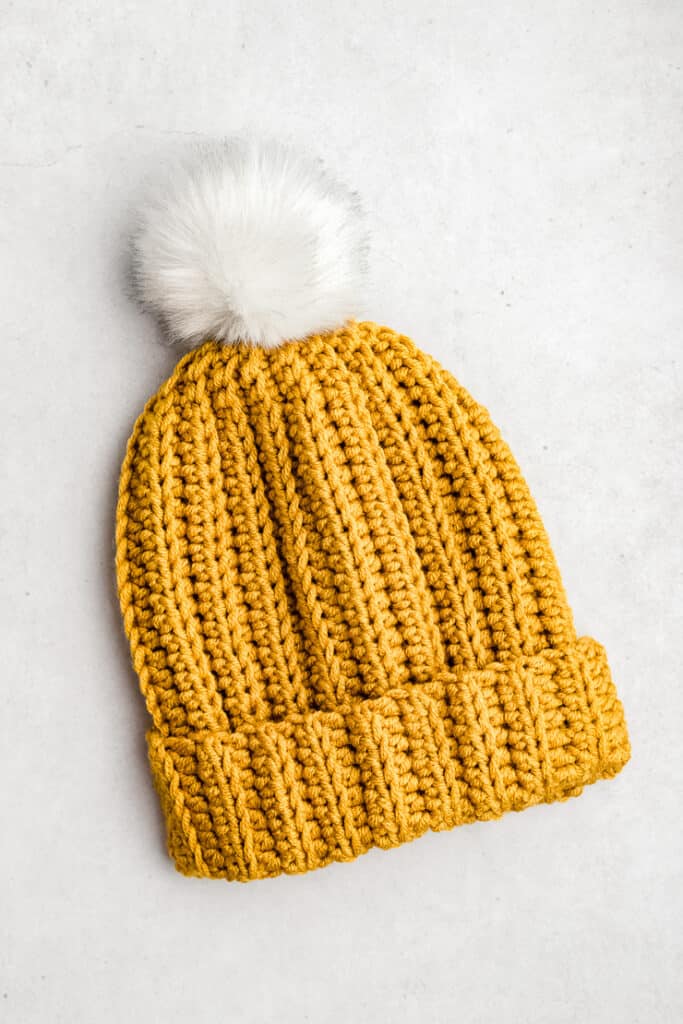
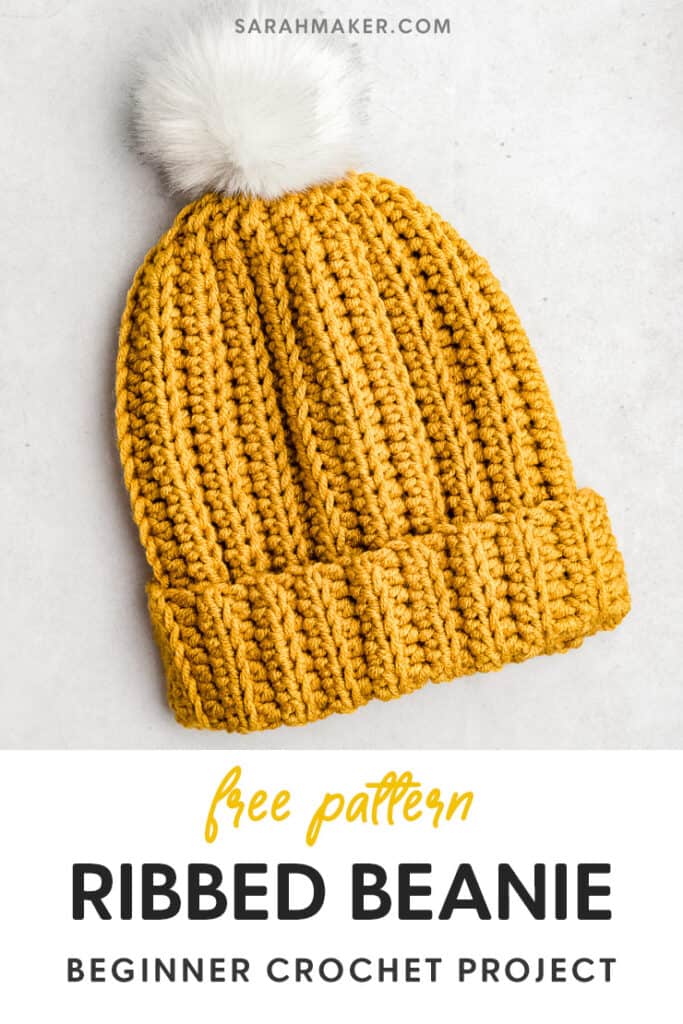
Learn how to make a crochet lid for beginners with this piece of cake Ribbed Beanie pattern. This crochet beanie is crafted with an like shooting fish in a barrel-to-remember sew together blueprint that resembles knit ribbing. The issue is a textured, stretchy fabric that functions like knit but crochets similar a dream! Made with just one skein of bulky-weight yarn, information technology'due south a great project for beginners and advanced crocheters alike.
Whether you're new to crochet, or just need an easy project to work on while you lot lookout Netflix, yous'll love this easy crochet hat blueprint.
This Ribbed Beanie is an easy crochet projection that's super satisfying to make. I designed this simple unisex beanie pattern with basic stitches and simple techniques, so it's very beginner-friendly. In my stance, it'due south the perfect crochet hat pattern for new crocheters.
The chunky yarn and not bad texture make for a lid that's warm and cozy — perfect during the cold winter months! You tin can make it with less than one skein of beefy yarn, then it's very affordable, as well.
This basic beanie is synthetic with an easy run up blueprint that works upwards quickly. I'll testify you how to make it a large range of sizes, from Newborn to Developed Large.
And don't forget, beanies make great gifts for the whole family unit! I love making this way of crochet hat for everyone on my vacation gift-giving list.
You can notice the ad-costless, printable PDF pattern right hither.
Related post: Later this, why not crochet a uncomplicated scarf to go with your new beanie? Hither is my favorite easy crochet scarf pattern – perfect for beginners and experienced crocheters alike.
Design Notes
You'll dearest how quick and like shooting fish in a barrel this crochet chapeau is to make. No complicated run up pattern here! Just elementary chains, single crochet, and one-half double crochet.
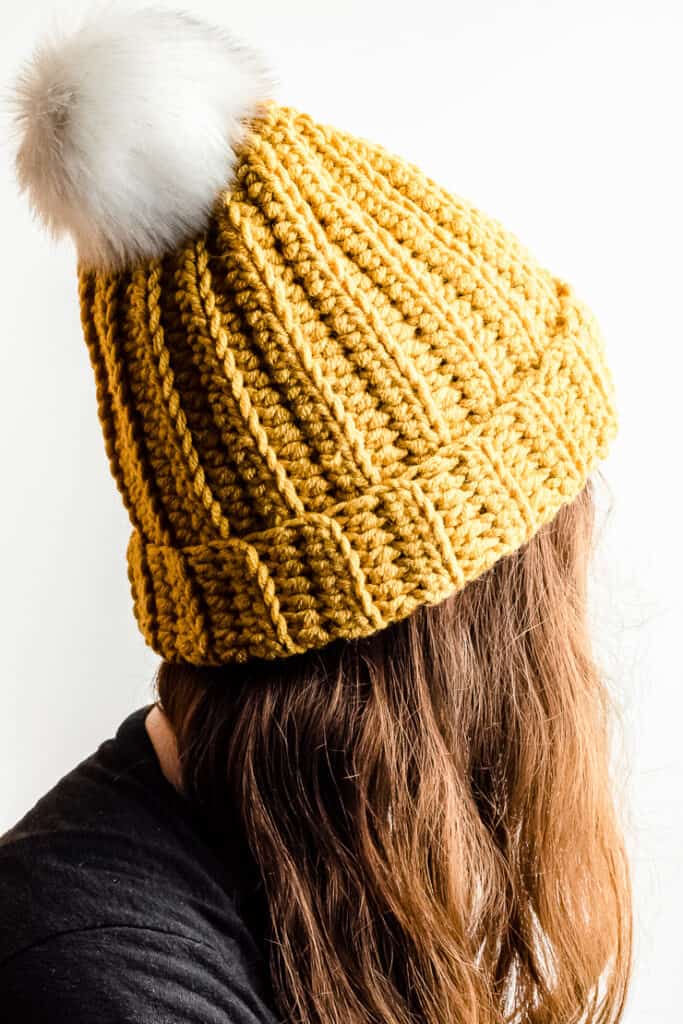
I designed this modern crochet beanie with soft bulky-weight yarn, then y'all know it volition exist warm and cozy. And, it's fabricated with a stretchy ribbing stitch pattern for a squeamish snug fit.
This modern crochet lid works up every bit a flat rectangular shape. To stop the hat, you'll stitch together the long sides and gather the opening to form a closed tube.
So, if you can crochet back and forth in rows, you lot can make this uncomplicated crochet beanie blueprint!
Crochet Ribbing Stitch
The torso of the hat is fabricated with a half-double crochet ribbing stitch. Making the hdc through the back loop only makes a stretchy crochet ribbing that'southward perfect for hats.
I added a few single crochet stitches near the crown of the hat to give it a natural tapered wait. This volition come in handy when information technology's time to gather the opening and stop the hat.
Pattern Variations
Sizes: The pattern is piece of cake to conform to fit different head sizes, including Adult, Teen, Child, and Toddler sizes. I'll bear witness you a lid size chart and a unproblematic formula to follow for a perfect fit each and every fourth dimension
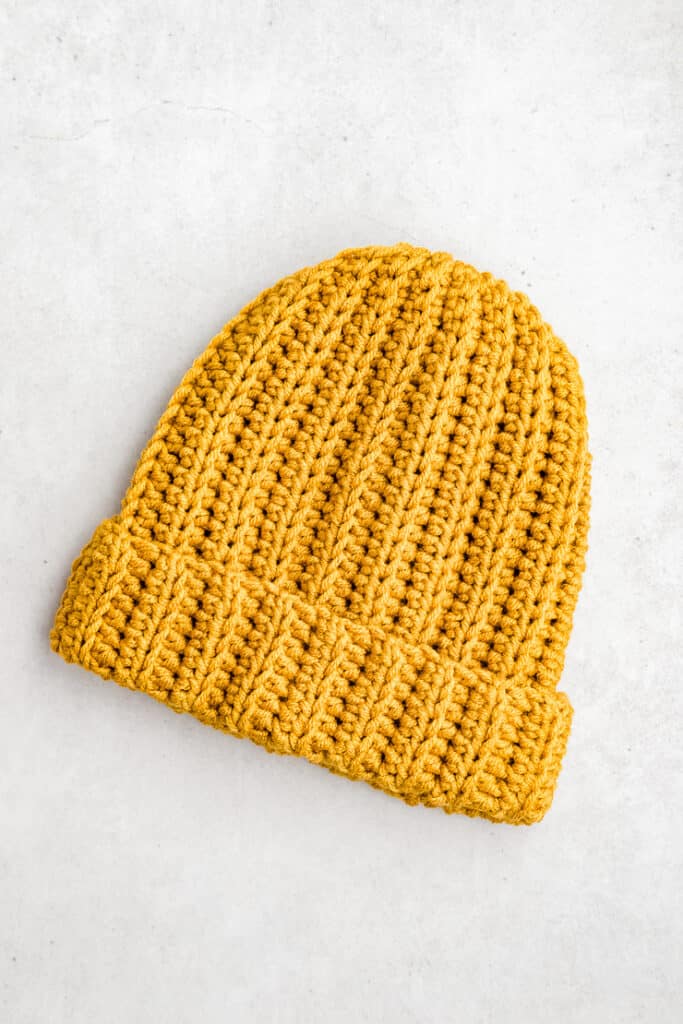
Brim: I designed the hat to be 12″ tall, which is long enough to fold over a prissy thick brim. If y'all don't want a fold-over brim on your hat, I will show you lot how to conform the pattern.
Style: I wouldn't say this beanie is a very slouchy chapeau – it'due south more of a classic beanie shape.
All-time Yarn for Chunky Beanies
I designed this design with 1 of my favorite yarns: Panthera leo Brand Color Made Easy. It's a nice chunky yarn that works up fast, so it's a great choice for quick projects.
This particular yarn has a multi-plied structure for some really nice texture and stitch definition. It's made from 100% acrylic, so information technology's soft, affordable, and really easy to care for. Plus, this yarn comes in more than than twenty gorgeous colors.
Please feel free to substitute any other yarn you love. Keep in heed that you will need to make a gauge swatch, and possibly go upwardly or down a hook size depending on your yarn choice.
Here are some other yarns yous can utilize to make this project.
- Panthera leo Brand Hue + Me
- Wool of the Andes Superwash Bulky
- Patons Archetype Wool in Bulky
- Lion Brand Woolspun
Crochet Hat Size Chart
Wondering what size lid to brand? To correctly size a crochet hat, yous'll want to make a hat that'southward merely a bit smaller than your head size. This way, when the lid stretches, it will fit your head perfectly.
To observe your perfect size, use a tape mensurate to measure the widest part of your head. This volition give y'all your caput circumference measurement.
Then, subtract almost 3″ from this to get the finished hat size measurement. Since this run up design is so stretchy, I find that 3″ of negative ease gives me a nice snug fit.
An example
For example, my caput measurement is 23″, which puts me betwixt the Adult Medium and Adult Big sizes. Afterwards I subtract 3″ of negative ease, I know I want a make the circumference of the hat xx″.
To make my beanie, I crocheted equally many rows every bit it took to attain a finished chapeau size of 20″, which turned out to be 36 rows plus 1 seaming row.
What is Ease in Crochet Patterns?
In crochet patterns, "Ease" refers to the difference in size between your project and your body. "Negative ease" means that your project will come out smaller than your body, only don't worry – it volition stretch!)
In general, crochet hats are designed with ii-iii″ (5-7 cm) of negative ease, depending on stitch pattern and stretchiness.
Size Chart for Ribbed Beanies
In the chart below, you can find average measurements for head sizes, according to the Craft Yarn Quango. I've as well including a column for finished hat size, accounting for that same 3″ of negative ease.
| Age | Head Circumference | Chapeau Circumference | Hat Length |
|---|---|---|---|
| Newborn | 12″-14″ | 9″-13″ | 5″ |
| Baby | xiv″-16″ | 11″-13″ | 5.75″ |
| Toddler | xvi″-18″ | thirteen″-xv″ | 6.5″ |
| Kid | 18″-twenty″ | 15″-17″ | 7″ |
| Teen | twenty″-22″ | 17″-xix″ | 7.five″ |
| Developed Pocket-size | 21″-22″ | eighteen″-19″ | eight.5″ |
| Adult Medium | 22″-23″ | 19″-20″ | 9″ |
| Developed Large | 23″-24″ | xx″-21″ | 9.five″ |
To brand a well-fitting hat, crochet as many bondage as you need to reach the appropriate hat length measurement. Add together ii.v″ to this measurement to add a folded skirt.
And then, crochet as many rows every bit y'all need to reach the appropriate chapeau circumference measurement.
Ribbed Beanie Crochet Pattern
Skill Level: Beginner/Piece of cake
Finished Size: Newborn through Developed – See Chart (in a higher place) for more sizes
For the purposes of this blueprint, I volition exist making an Developed Medium, or a hat length of 12″ and a circumference of xx″.
Gauge: 12 sts and seven.5 rows per four″. Check your guess, and factor this into your size calculation.
Materials
Yarn Weight: Bulky weight yarn, such as Lion Brand Color Made Easy (Category 5)
Crochet Hook: 1000-10.5 (6.5mm) hook, or whichever size claw y'all demand to meet gauge
Yous'll also demand:
- yarn needle
- stitch markers, if desired
- ruler or tape mensurate, if desired
Stitches and Abbreviations
- st/sts – stitch/stitches
- ch – chain
- sc – unmarried crochet
- hdc – half double crochet
- BLO – back loops only
Special Stitches
There aren't any special stitches in this hat pattern. But, y'all should know that almost all stitches will exist made in the Dorsum Loops Only. You volition see this abbreviated in the pattern as BLO.
Pattern Notes
- This pattern is written in US terminology.
- The hat is worked apartment, back and forth in rows.
- And so, the finished flat piece is seamed to create a tube.
- After that, one end is gathered to create the hat shape.
Pattern Instructions
Here's how to crochet a winter hat for beginners.
First, I took my measurements. I want a brimmed lid with a finished length of 12″ and a circumference of 20″.
Row 1: Chain 36. Starting in the second chain from the hook, make 30 hdc. 5 sc. Plough. (35 sts)
Row ii: Chain i. Starting in the same (first) stitch, 5 sc blo, 30 hdc blo. Plough. (35 sts)
Row 3: Concatenation 1. Starting in the same (first) stitch, xxx hdc blo, 4 sc blo, ane sc. Plow. (35 sts)
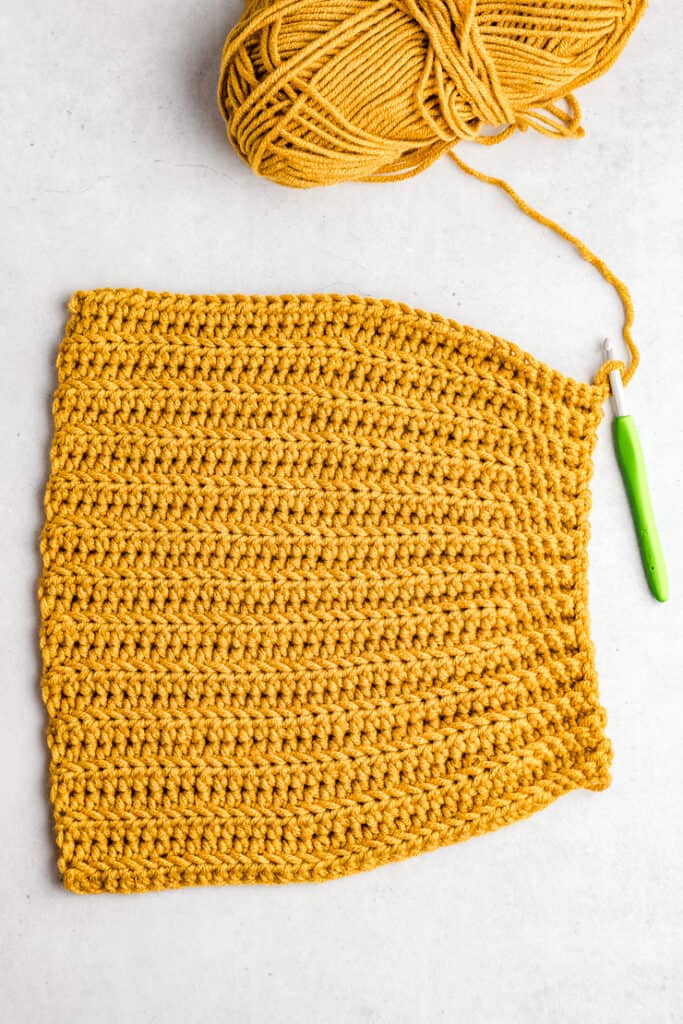
Repeat rows 2 and iii until the crochet piece measures xix.5″ along the long edge – or about i/two″ shorter than your desired finished hat measurement that you calculated before.
For my lid, I crocheted 36 rows total. The final seaming row will add the last 1/two″ of length that you need to meet your desired finished measurement.
Note: Take this measurement forth the long edge of half-double crochet stitches, not the long edge with the single crochet stitches. A fabric measuring tape is useful here, since information technology's more flexible than a ruler.
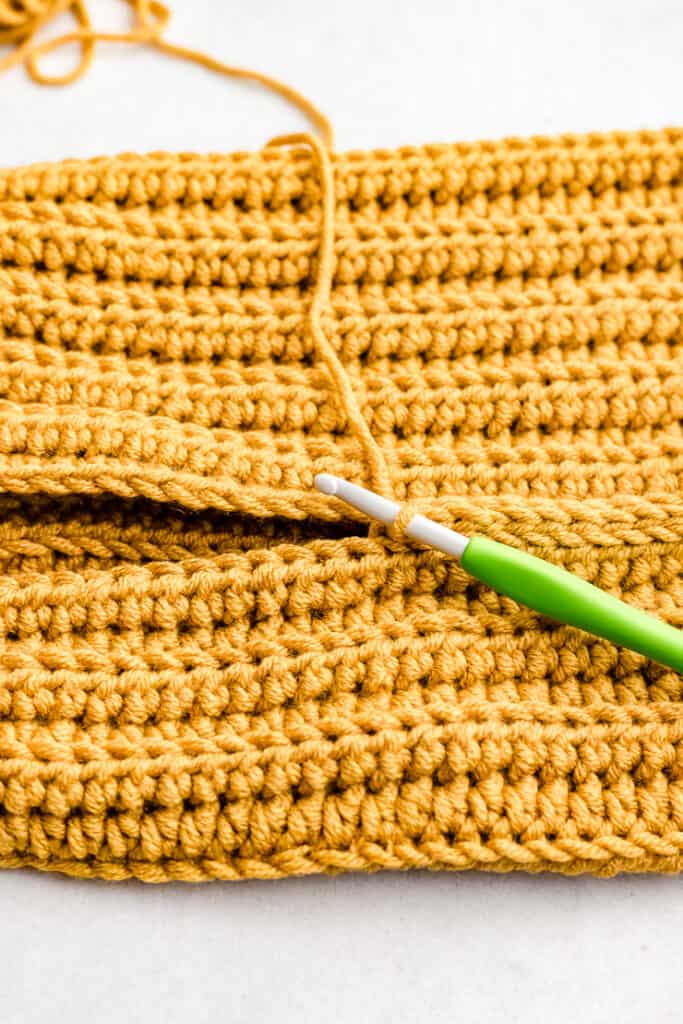
Finishing: Seam the sides.
Hooray, you're almost finished! Now that information technology's fourth dimension to seam the hat together, yous take a pick between ii seaming techniques.
Option 1: The get-go choice is to seam the sides of the hat together by working the last row of stitches through loops on both edges.
Basically, yous'll be making the terminal row of stitches and the seam at the same time. This option will leave a minor raised line on the outside of the lid, merely information technology's mostly bearded past the ribbing texture.
Final row: Starting time, fold the crocheted rectangle in one-half, right sides out. Brand the last row of stitches every bit indicated in the pattern – but insert your hook through both the back loop of the working row and both loops of the showtime (starting) row.
For example, my concluding row was a "Row 3" row, so I crocheted: Chain 1. thirty hdc blo, 4 sc blo, and 1 sc through the loops on both sides to create the seam.
Choice two: Or, if y'all prefer, you can seam the sides together with a simple sideslip run up seam. A sideslip stitch seam volition get out a minor raised line that you lot tin turn to the inside of the hat when y'all wear it
Earlier seaming, crochet every bit many rows as needed until the piece measures twenty″, or the length that you calculated earlier. Then, turn the hat right sides together. Seam the sides with a row of slip stitches (sl st) made through both loops of stitches on both edges.
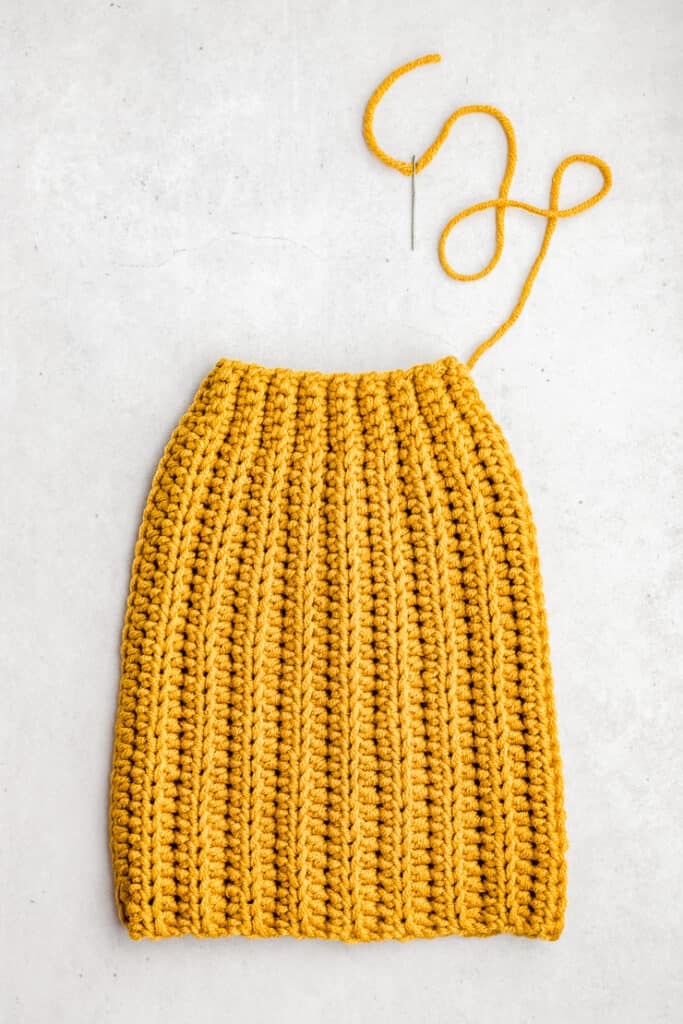
Gather the top of the chapeau.
Pull yarn through the last loop and trim a long yarn tail. Employ the yarn tail and a darning needle to make long running stitches forth the top edge of the chapeau.
Pull the yarn tail to gather the top edge of the hat, and pull information technology closed. You can knot the yarn tail to secure it. Weave in the ends.
How to Attach a Pom Pom to a Crochet Hat
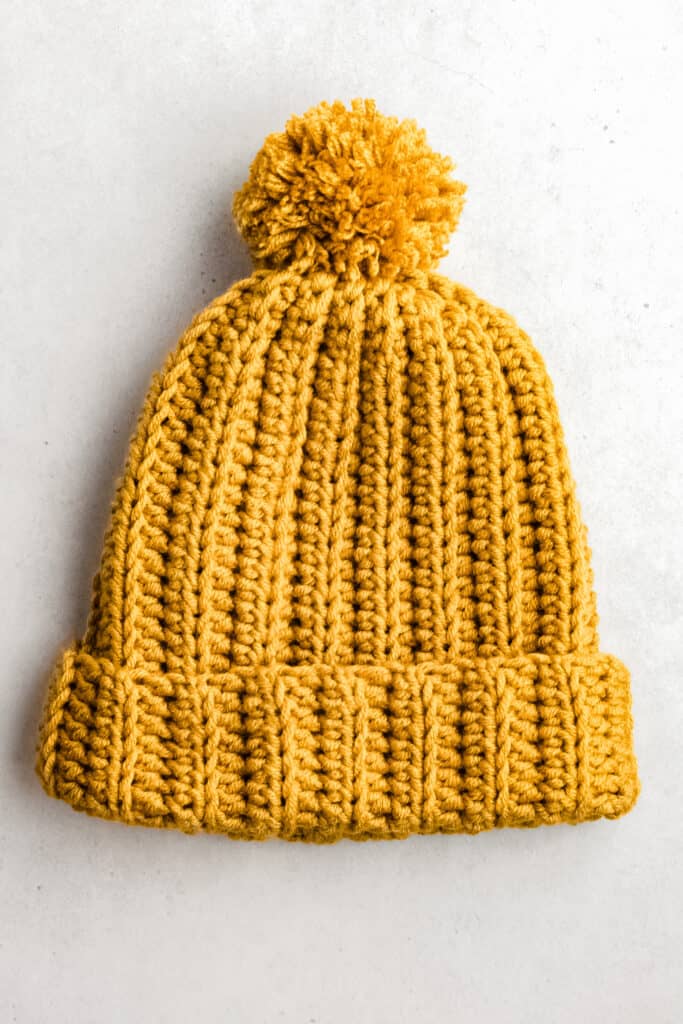
I love to finish beanies with a big pom pom!. They are easy to brand and even easier to adhere to crochet hats.
Pom-pom maker tools are relatively cheap and made actually nice round pom-poms. I like this prepare because it comes with tools to make both small and big pom poms.
But, in that location are many ways to make pom-poms without a pom-pom maker. You can made them with your hand, a toilet paper whorl, or a paper-thin cut-out template.
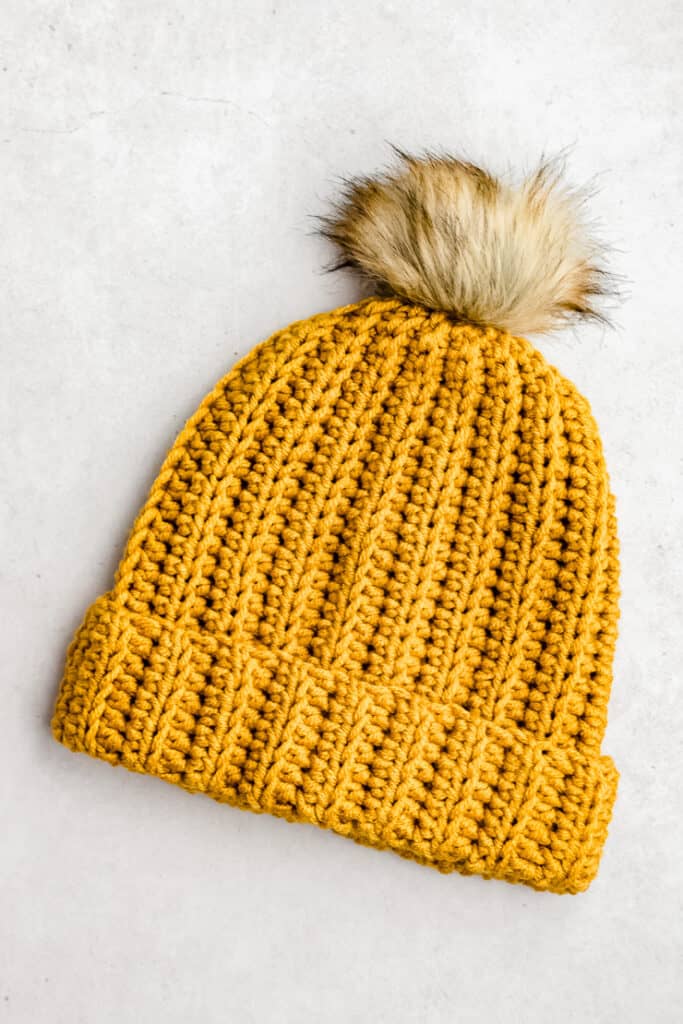
And, if you'd like to use ane of those cute faux fur pom-poms, here are some I've tried and recommend. They come with a minor elastic loop that you tin can utilise to attach them to your hats.
Explore More than Crochet Patterns
If you love to crochet as much as I do, I retrieve you'll love these other free crochet patterns.
- Herringbone Crochet Cowl Pattern
- Reusable Cotton wool Crochet Face Scrubbies
- Twist-Forepart Crochet Ear Warmer Headband
- Classic Crochet Baby Booties
Take questions? Join the Facebook Group!
I hope this commodity was useful for you! If y'all accept any additional questions, feel gratis to join my Facebook Grouping. I created this group for you to share pictures, enquire questions, and help each other out.
What's Next?
Pin this post: Save this tutorial to your Pinterest boards then that you tin can come back to it later.
Leave a comment: I beloved to hear your feedback. Tell me in the comments below!
Share on Instagram or Facebook: When you make this project, share it on social media and tag me @sarahmaker. I dearest to run across what you make!
Instructions
- Row 1: Chain 36. Starting in the second concatenation from the hook, make 30 hdc. 5 sc. Plough. (35 sts)
- Row 2: Chain 1. Starting in the same (first) sew, 5 sc blo, 30 hdc blo. Plow. (35 sts)
- Row 3: Chain 1. Starting in the same (first) sew together, 30 hdc blo, four sc blo, 1 sc. Plow. (35 sts)
- Repeat rows 2 and 3 until the crochet piece measures 19.5″ forth the long edge – or nigh 1/2″ shorter than your desired finished hat measurement you calculated earlier.
- To seam: Fold the crocheted rectangle in half, right sides out. Work the last row of stitches, following the pattern, through loops on both edges.
- Gather the meridian of the lid: Fasten off and trim, leaving a long tail. Using the yarn tail and needle, sew long running stitches along the top edge of the hat. Pull yarn to gather and close the top edge. Make a knot to secure it, and weave in the remaining ends.

Sarah Stearns has helped thousands of makers find their next arts and crafts project with complimentary patterns and step-past-step tutorials on her blog, sarahmaker.com. Read more.
Her work has been featured in Scientific American, Good Housekeeping, Vox, Flat Therapy, and more than.
Source: https://sarahmaker.com/easy-crochet-beanie/